Categories
PC Guides

Everything You Need To Know About The Windows Hybrid Shutdown Technique

Who wouldn’t like to have a computer which starts up at no time at all? And sleeps and wakes up immediately when you want it to. The ” Hybrid Shutdown technique ” is a technique which Windows has developed carefully keeping its users in mind. Actually this technique primarily aims Fast Booting. It is much different than the normal shutdown procedure which existed until the Windows 7 operating system. It is estimated that with the hybrid shutdown technique your computer boots 30 to 70 percent faster than the Windows 7 and earlier versions.

Key Points regarding the window's hybrid shutdown technique

What You Need To Know About Hibernation:

The Hybrid Shutdown technique is constructed based on the concept of system hibernation. So first let us quickly go through what and how hibernation works. Generally in any version of windows the hibernation operation boots up the computer and resumes all your ongoing work. The main point on how it varies from a normal shutdown is that it boots much faster and also the applications you are working on are ready for you. The reason for this behavior is that the operating system doesn’t shut down completely. It saves all the files and data into a huge file: hiberfil.sys and shuts down the entire hardware. Remember, though the entire hardware is out the operating system is still up and consumes very insignificant amount of power (This is the reason why it is generally a better option if you shut down your computers so that you can save power).

Later when the computer is turned on, the computer now has an active operating system ready to power up the entire user session. Though the speed of this boot up depends mainly on how large file the hiberfil.sys is, mostly it is faster than starting from a complete shutdown. Now you can understand how exactly Windows 8 has worked on this issue and how the hybrid shutdown technique works.

 Hybrid Shutdown Technique Varies From Normal Shutdown In Following Ways:

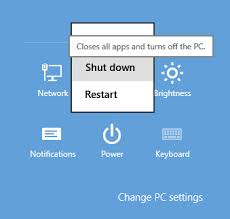
1.)              After you select the Shut Down operation present in the power menu, the user session shuts down just like it used to in the earlier Windows versions (This is because the user session is made to shut down faster).


2.)              The kernel session is not closed like for other windows versions. It actually gets hibernated and the entire kernel session saves all the data into the memory. This is because the operating system or kernel takes more time to shut down than when it is hibernating. Also the hardware is shutdown.


3.)              While you turn on the computer, thanks to the UEFI system which is much more efficient than the BIOS system. It helps your hardware kick-start in no time. Also the extra cores of your processor only make all this process better.


4.)              The hardware session also makes sure all the required drivers are loaded. Now the operating system which is already active simply has to resume its operations and that’s it.!!

The first and second steps operate in conjugation thus reducing those extra second a computer has to go through to shut down in earlier versions. The third and forth steps make sure your computer boots up much faster.

This is the Hybrid Shutdown Technique, which is hence simply an improvement over the earlier shutdown operation.

Categories
PC Guides

5 Differences Between Optical Mouse And Laser Mouse

Computer mouse is one of the most used peripheral in our lives. Especially in all those non touch screen computers. Actually there a various types of computer mouse that are available in the market. Each differ from the other in size, shape and the purpose. But all these computer mice can be broadly classified in to two types: Optical Mouse and Laser Mouse. There was a time when these both were not prevalent and the entire world was dependant on the ball mouse. But now all the computer mouse you see are either the optical mice or the laser mice (a subtype of optical mice). So in this article we present to you the differences between optical mouse and laser mouse.

differences between Optical Mouse and Laser Mouse,differences between Optical Mouse and Laser Mouse , differences between Optical Mouse and Laser Mouse

The 5 differences between Optical Mouse and Laser Mouse:

  1. The Light Source:

One of the most notable differences between a optical mouse and laser mouse s the light source they employ. Usually the optical mice use a red LED or in some cases blue LED as a light source. But the laser mouse use a infrared laser beam as light source. This infrared light is not visible to the naked eye so it appears as if there is no illumination on the bottom surface of the mouse.

  1. The Laser Mouse Offers More Buttons:

The Laser mouse has extra buttons so as to suit the purposes of the user. However, a optical mouse only consists of two buttons and a scrolling wheel. Also the extra buttons provided in the laser mouse can be programmed by the user. Hence a good user experience is guaranteed.

  1. How Sensitive They Are:

One look at the DPI value and you can understand how sensitive a particular mouse is. The DPI ( Dots Per Inch) is defined as the number of movements that a mouse can interpret as the mouse moves for an inch. Generally the DPI value should be more to ensure better performance. In case of the optical mouse the DPI is around 800 while laser mouse have DPI around 3000.

  1. The Surface Of Operation:

The most appreciable contribution of the optical mouse is to work perfectly on almost all surfaces. But the basic working principle of optical mice is hampered by reflective or glossy surfaces. Few models of optical mouse are hence to be used only along with a mouse pad. Anyway there are no such shortcomings with the laser mouse. They are more versatile and can work on any surface.

  1. The Cost:

Generally, the starting prices of both these types are almost same. But the high end game supporting laser mice are lot more costlier than the optical mice. This is mainly because of the wide features they offer their users which include the programmable buttons.


Categories
PC Guides

The Shutdown Operation And The Startup Operation – EXPLAINED!!

Well, shutting down your computer is a very common thing. We have been doing this for some hundreds and thousands of times over the years with different operating systems too. And for the fun-loving, there actually are a number of ways in which you can shut down your computer. Like say, you can shutdown your computer remotely, setup a shutdown timer and so on. But did you ever think what happens after you ask your computer to shutdown?

Actually the process involved in this very small operation is quite tricky and complex. So we have decided to come up with this article to take you one step deeper into the nuts and bolts of a computer. And don’t worry we did put in a lot of efforts into this article to keep it plain (without lots of jargon) and easy to understand.

The Start-Up or Boot Operation:

shutdown operation , startup operation , shutdown operation , startup operation

First of all, to make the article complete we start our discussion right from when you press the power button. So this is what happens after a user presses the power button of the computer.

  1. After pressing the power button, first the firmware initiates and checks for all of it settings. This is actually a pre-boot session and the process ends once it detects a valid system disk.
  2. Then the firmware starts up the computer hardware and simultaneously reads the master boot record (MBR) and starts applications which help to load the operating system (like bootmgr.exe which then starts Winload.exe).
  3. The above two steps are the preliminaries the computer takes care of before loading the operating system.
  4. As soon as all the essential drivers are loaded, the Windows Kernel starts up and gets all those start-up applications to load along with it and makes the computer ready for the user.
  5. Once all this is done, the computer requests the user to log in and the user provides his username. Based on this username-password combination, the computer reads all the setting the user has pre-defined and loads all the other applications present in BOOT_START. Along with that, it also prepares the environment so that the user can start working.

To conclude the startup operation in one sentence you can simply quote that during the start-up three main processes occur: Hardware Initialization, Operating System Loading and Preparation of user’s environment.

The Shutdown Operation:

shutdown operation , startup operation , shutdown operation , startup operation

As you can imagine the shutdown operation is exactly the reverse of the booting or startup operation. But for your better understanding we have listed down all the steps involved in which it happens:

  1. Once the user initiates the shutdown process by selecting the shutdown option. (It can be done in many ways and we will surely discuss about it in our later articles in detail).
  2. The Operating System informs about this to all the running applications. It also provides some time to all these to quickly save their data. In certain cases if the application is not capable of completing this process fast the operating system also has the ability to provide a little extra time and ask the user if to close the application instantaneously or wait for it to complete its process.
  3. Next, it closes all the user accounts that are logged in earlier by the user.
  4. Now it broadcasts messages to all the services informing them a shutdown operation has began and in parallel shuts them down.
  5. Then it broadcasts the same message to all the connected devices and stops them.
  6. When all this is done, the operating system throws all the remaining data into the system disk and ensures it is saved.
  7. Finally with the help of the ACPI interface, it manages to power down the computer.

These are all the steps your computer goes through when you ask for it to shutdown. But note that this process was possible in the computers which were powered by the operating system versions prior to the Windows 8. But the Windows 8 operating system has managed to chop down few seconds both while starting up and during the shutdown. And this technology is named as the Hybrid Shutdown technology.

ALSO SEE: Windows Hybrid Shutdown Technology

Categories
PC Guides

What To Look For While Buying A Computer Mouse

The computer mouse is one of the most used peripheral in the desktop computers. Even scientists and doctors recommend using an USB mouse to laptop users. Mainly to maintain a certain distance from laptops to avoid serious consequences due to the radiations. But simply selecting an optical mouse is not so simple. We’d say you need to know what to look for while buying a computer mouse. For those who don’t agree you are free to go and search the umpteen optical mice available in the one and choose something you like. But if you want to purchase the best optical mouse that suits you, here it is this article is for you.

What To Look For While Buying A Computer Mouse:

Buying A Computer Mouse, Buying A Computer Mouse,Buying A Computer Mouse

The Technology Aspect:

The ball mouse technology is long extinct. We don’t think you will even be able to find them in any stores. But if you do, simply ignore them you deserve much better. Next, the choice is between the most popular optical mouse and the many buttoned laser mouse. The laser mouse is the latest advancement of the optical mouse. And you should go for a laser mouse if you do lot of internet surfing. The extra buttons they provide improve your internet experience to a great extent. If you are not much of a internet-maniac you could rather go with the optical mouse option as these cost less than the laser mouse and could save you some money.

The Grip:

It is true that all the leading computer mouse manufacturers take a very serious look into this issue. The feel you experience while using your mouse is the by-product of all their efforts. But the problem is the way different people move their hands to respond and the sizes of their fingers is different. The computer mouse manufacturers go through a lot of study and design their products. So as a user you should be sure if the mouse is right for you. If you are going for multi-buttoned then make sure your fingers rest appropriately on the buttons. A little longer or shorter makes your fingers stretch out or curl which could lead to some effects on the long run.

The Battery Life:

If you prefer a wired mouse, this is not a concern for you. But if you’re going for a wireless mouse, then make sure you are buying a computer mouse which has long battery life. Definitely changing batteries will be such a headache in the future if you miss out on this issue. So we recommend you to go for a laser mouse if you want a wireless pointing device as the reputation of battery backup for optical mice is not so good.

The DPI Factor:

Dots Per Inch (DPI) is a measure of the sensitivity of the computer mouse. Exactly speaking, it is the measure of how many movements the mouse can detect when moved an inch. More the DPI better will be the experience as a user. So make sure the DPI of the mouse you are going to buy is good enough to ensure smoother and pleasant experience.

Try These Top Charts:

Best Bluetooth Mouse Of 2014

Best Budget Computer Mouse – 2014

Best Gaming Mouse For Enhanced Gaming Experience


Categories
PC Guides Web Guides

This is How The Wireless Internet Data Cards Work

The wireless internet data cards also called the connect cards have redefined the online experience altogether. Instead of using cables or telephone lines, one can make use of these wireless internet data cards to access internet even on the go. Their services can be utilized from anywhere round the clock.

Also the speeds they provide are good enough to keep your entertainment going. But did you ever wonder how all of this is possible? How exactly these wireless internet data cards connect to the internet? How data transfer is possible? In this article the take-away is the answer to series of such questions relating the internet cards.

This is How The Wireless Internet Data Cards Work:

This is How The Wireless Internet Data Cards Work

Wireless internet data cards work almost similar to our cell phones. Instead of carrying out data transfer through wires, both use electromagnetic waves.

Actually the entire data transfer is not wireless. Though it is wireless on the users end the entire process is combination of wired and wireless communication. Initially, the routers or access points receive data in binary form through wires.

These then rely on antennas present in them which have the ability to transfer these electrical signals (which are in binary) into the form of Electromagnetic Waves. The transmitter and receiver section (wireless USB data cards) are tuned to a particular frequency range (between 2.4GHz to 5GHz) for effective and uninterrupted reception of the data from the transmitter section.

The wireless internet data cards when plugged in always hunt for these signals. If these cards are within the broadcasted ranges, they pick up this signal.

Once these data cards receive all this information, the entire process occurs in the reverse direction. These cards then broadcast the Electromagnetic Waves and communicate with the closest tower in that area.

Before the connection is made, all your details are verified. And finally the connection is opened and you can access the internet. This entire process occurs each and every time you try to establish a connection.

Once you close the internet connection on your computer, the wireless internet data card stops receiving or transferring data. The carrier network are constantly involved in calculating the amount of data you have accessed each time the connection is open for billing purposes.

NOTE: Because the free air composes lot of impurities, there is always the problem of attenuation (decrease in signal strength) of EM Waves. Due to this reason the expected internet speeds are sometimes not delivered.

But the carriers have always been taking steps to improve our internet usage experience.

Categories
PC Guides

The Optical Mouse Components That Keep It Alive

The optical mouse was developed by the Agilent Technologies in the later part of the 1990s. The earlier mouse consisted of moving parts due to which its performance wasn’t very good. Here in this article we look in detail all the optical mouse components that power its performance. For studying all the optical mouse components we take a step deeper into the optical mouse.

optical mouse components

Image courtesy by : present softwares

These Are The Optical Mouse Components And Their Functionality:

1.)     The LED at the bottom of the optical mouse is a vital component in the entire operation of this computer mouse. It shines whenever the mouse is disturbed from its initial position. It also turns ON with every click of the buttons on the left or right. Most notably, this is always a red LED.

2.)     The Plastic Prism right on the bottom surface is also one of the very important optical mouse components which refracts the light from the LED at a particular angle.

3.)      The light from the LED falls on the desk and reflects in all directions. A part of this reflected light is collected by a lens and directs it towards a sensor.

4.)     The optical navigation engine then interprets the movement of the mouse based on the information it receives from the sensor. It is ‘the’ very important optical mouse components. And is regarded as the brain of the optical mouse.

5.)      The scroll wheel at the front is directly mounted onto a switch mechanism. This switching mechanism determines both: how much the scroll wheel is rotated and if it is pressed or not.

6.)     The switching mechanism employed is actually different in case of different manufacturers. Mostly the optical mouse use potentiometers (similar to the volume control knobs), rotary switches or optical encoders.

7.)     The microswitches present underneath both the buttons detect any activity or tapings over these buttons.

8.)     Finally in wired computer mice, the USB cable transfers information in digital form to and from the computer. (binary information about clicks and motion of mouse pointer to the computer’s main processor and bring back power to the optical mouse)

9.)     In case of wireless mouse, this part is replaced by an antenna which transmits binary information in form of electromagnetic waves which are received by the USB connector.

Also See: Differences between Optical Mouse and Laser Mouse

Categories
PC Guides

How to Fix Computer Overheating Caused by Blocked Heat Sink

One of the most common problem in computers is overheating , it can even lead to random shutdowns. There could be many reasons behind this heating like listed in the article in the link.

However, since the most common overheating factor is the blocked heat sink of the PC. In this article we will show you a simple solution to fix this particular problem.

All the Pros and Cons In Liquid Cooling Your Computer

Liquid Cooling is a technique through which heat from the components can be discarded; thereby preventing any damage

Read More

Steps To Fix An Overheating Computer :

Step 1 : Unplug your computer before opening it’s case :

For Safety : Wear any static wrist guard if possible, or even touch any metal case before handling the inner parts of CPU ( This is to ground the static charge that you may have).

Step 2 : Consider The alternatives:

Overheating may be also caused due to the poor air circulation in your CPU. In that case you can add another fan to your CPU for reducing this problem .

A small vacuum is a good alternative but you have to be very careful while inserting it . Take your own time and be very thorough with this step. After that take a cotton swab dabbed in some alcohol . Now go over to the internal case components and clean them .

You can go over the external case even with a rag and a little bit of water. Allow your computer case 2 hours to dry out before you turn it on.

Step 3 : Take out the small CPU fan plug from the motherboard :

Hold the plastic end and pull gently until it comes out. Do not pull it by the wires.

Step 4 : Remove the CPU cooling fan :

It is held in place on the circuit board ( motherboard ) by four lock-down levers or by some Phillips screws .

Step 5 : Release the CPU:

Mostly it is held in a place by a small lever that lifts to release the computer’s processor.

Step 6 : Be careful while handling the processor :

Take care not to drop the processor or pull it off if it is stuck . If you Drop the processor then it is  likely to be damaged. Instead , it might be stuck to the heat sink by the thermal paste.

Try to separate them very gently . An ID card-type of card may be useful for this task, but be careful that you don’t damage the CPU .

Step 7 : Clean your heat sink :

Blast the compressed air directly on to the heat sink. It only takes a few minutes to clean a blockage. If it’s persistent, Then allow a few seconds before repeating it .

Step 8 : Carefully clean the residual thermal paste :

You can use a clean cotton bud or paper towel for this work . A little rubbing alcohol may help you , but too much usage could cause heavy damage.

Step 9 : Replace the CPU in its socket :

Now replace the CPU in its socket from where you have taken it .

Step 10 :Apply a thin layer of thermal paste :

Use as little as possible because Too much of usage can lead to overheating problems all over again.

Step 11 : Replace the heat sink :

Clip that clip back into the CPU. Secure the fan back on . Plug it back into the motherboard.

Step 12 : Tidy up the case :

Make sure that the stray wires are secured away from CPU fans, then put the cover back in there place.

Step 13 : Test your computer to make sure that everything works fine.

Make sure you write this all down somewhere or open our page in some other computer, so that you don’t do anything other than mentioned.

Your Thoughts:

Is your PC getting constantly overheated too? Discuss with us your issue and we will provide you the best solution. Also send us your suggestions to improve this article in the comments section below. Thanks!

Categories
PC Guides

The Main Causes Behind The Computers Heat

In computers heat is a very common phenomenon. The thermal radiations are mainly the by-products of the currents flowing in the circuitry of the computer’s CPU case.

To state it simply, electricity is the main reason why your computer turns hot. In this article you can understand why actually in computers heat is liberated  .

Computer overheating , causes of computers heat

These Components Cause Computers Heat:

Whatever the type of computer it is, a desktop, a laptop or a netbook all of them are built up with a lot of parts (silicon-based). All of these parts certainly require electricity. And the levels of current each component draws is completely dependent on its functionality.

The radiation from a component which draws more current is higher than the others. Also the other reason is the higher internal resistance among all the thousands of circuits. So exactly speaking as long as your computer is on, heat is always generated.

•  The Processor and Graphic card are two such components which cause the maximum heating. Actually the heat is so much that you can almost cook over them.

•  The heat these components generate is not always the same. With the increase in load (more operations to be carried out) the temperatures get higher and higher.

•  Usually during gaming the GPU has to handle lot more high level calculations. In some cases the temperatures of the graphic cards sore higher than that of the processor.

Also See: Applications which are meant for GPU.

•  Hard Disk Drives also contribute largely to raising temperatures within the case.

•  Optical Disk Drives also produce large amounts of heat during reading and writing from and into CDs and DVDs respectively.

•  The other sources of heat are also the LEDs. Though the amount of heat they liberate is less, it can’t be neglected completely.

It goes without saying that all the components have internal resistance due to their material characteristics and continuously generate heat. Added to this, the room temperatures also plays a part in the elevation of temperatures within the computer’s CPU.

The fans inside desktop computers take care in moving this heat out of the CPU case through vents. But if this heat is not being removed fast, it could cause some serious damage to all the components inside and hence poses the ultimate threat to your computer.

If you have an overheating issue, this article will surely help you.