Categories
Featured

These Are The 6 Steps  Involved in 3D Printing

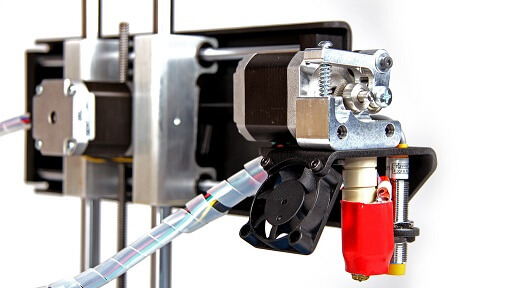
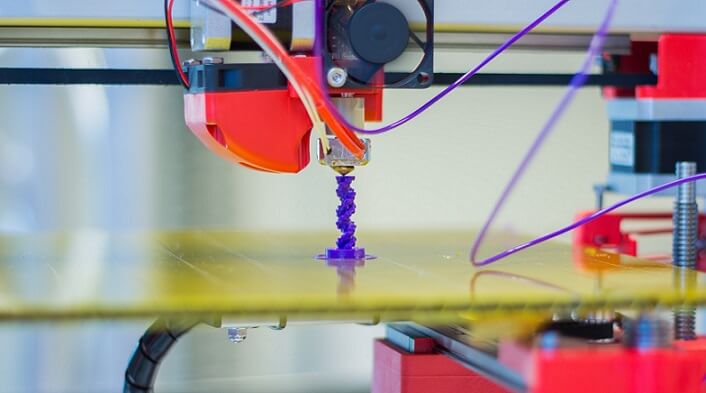
3D printing also known as additive manufacturing, it is that process through which solid objects can be built from digital files. This can be achieved with using various 3D printing techniques. Most of these techniques involve the creation of an object by laying down thin layers successively. Well anyways, the process of 3D printing and the various techniques involved is out of scope of this article. In this article we take you through all the 6 steps that are to be undergone for printing a 3D object.

These Are The 6 Steps  Involved in 3D Printing

Here Are The Steps Involved in 3D Printing:

#1 CAD File Development

In order to produce a 3D object you first have to have its virtual design. This is to be done using the Computer Aided Design (CAD) software. Through this the exact dimensions of the objects considered and simulated to see how the object will behave under various conditions.

#2 CAD File Conversions

Once the CAD file is developed, the next thing one has to consider is converting it into specific file formats. The file formats are specified based on the technology of printing being employed by that particular 3D printer. For instance, the CAD file has to be converted into a STL (standard tessellation language) if the printer is based on the stereolithography technique.

#3 STL File Manipulation

Now that the STL format file is ready with you, all your computer now needs is a 3D printer which can print using the stereolithography technique. But before this, users will have to set the orientation and size of the object to be printed. This is similar to the case of a 2D printer.

#4 Preparing The Printer

Now that everything about the digital file is ready, you need to make sure the 3D printer is ready as well. This means installing properly the polymers, binders and other material which are necessary to perform a print operation. Once all such requirements are met, you are almost ready to print.

#5 The Building Up

Once the process has started, it is now all about patience. These printers aren’t as faster as the 2D printers. Based on the complexity of the object to be printed, the span of printing varies. Simply all that one has to do is wait and perform random checks to make sure everything is being done flawlessly.

Since the entire construction of the object is in form of very thin layers, it definitely is going to take some time.

#6 Post Processing Stuff

Once the entire process is done and the object is ready, make sure you handle it carefully. Any actions in haste could prove to be costly. So right from putting on some gloves to bring the object out of the printer to brushing off any residual powder, everything is to be handled carefully.

And that’s it! If your CAD file is perfect and the post processing part is well executed, then you’ll have it; your first 3D printed object.

[Source: The Book ‘Additive Manufacturing Technologies: Rapid Prototyping to Direct Digital Manufacturing’]
Categories
PC Hacks Web Guides

How To Connect A Hard Drive To Every Computer On The Network

Many times we may have to move files from one computer to another, say, for printing something or just to watch it. If our computers are not having Bluetooth then we need to move the files to a flash drive or hard disk and later copy them to other devices.

To solve this problem, we have come up with a solution by which you can connect a hard drive to all the computers that are connected to the local network , either by Wi-Fi or Ethernet.

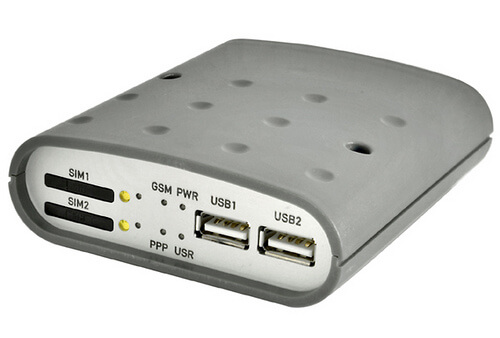
Even If don’t have a hard drive, no need to worry. You can even use a flash drive for this work . What all you need is to have a router compatible with this method.

How To Connect A Hard Drive To Every Computer On The Network

Every Router with a USB input is compatible with this process. Most of the modern Routers have this facility then the old once’s.

Steps To Connect A Hard Drive To Every Computer :

We also need to know the gateway, ie the IP address.

To Check Your IP Address : Follow The Steps Below :

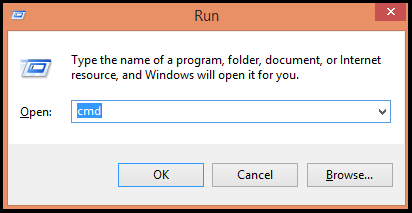
Step 1 : Open Run ( Press ” Windows + R ” to open ) and type cmd in it.

How To Connect A Hard Drive To Every Computer On The Network

Step 2 : Type ” ipconfig ” in the displayed command prompt.

How To Connect A Hard Drive To Every Computer On The Network


Step 3 : Now your Default Gateway will be diplayed which is usually something like ” 192.168.1.1 “.

Follow the given below steps to make your computer to recognize the hard disk or pendrive :

Step 1 : Connect the device to the router.

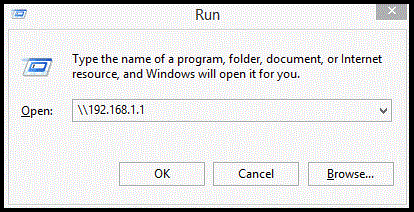
Step 2 : Now open Run and type the default gateway ( i.e the IP address which we got in the first process ).

How To Connect A Hard Drive To Every Computer On The Network

Ex:\\192.168.1.1

Step 3 : Now a dialog box containing folder like usb0_0, usb1_0, and so on will be displayed. Find out the name which is assigned to the flash drive or hard drive to which you want to connect.

Step 4 : Now open ‘My Computer’, you can do it by just pressing ” Windows + E “. Then just right-click on the bottom left and select ” Add a network location ” option.

Step 5 : Now press Next and select the ” choose a custom network location ” Option.

Step 6 : Again press Next and then introduce your gateway i.e type ” \\gateway\usb1_0 “. In this case ” usb1_0 ” is the flash drive folder and gateway is the default IP address.

Ex:\\192.168.1.1\usb1_0

Step 7 : Give a Name to it and press accept.

That’s It. This is something that will save much time if you usually work on multiple computers simultaneously and do not want to use the services like cloud.

Share Your Views In Form Of Comments….

Categories
PC Hacks System Performance

Free Up Your Disk Space By Deleting The Windows.old folder

Our computers usually have enough storage capacity, and allow us to store many files. It’s like a huge box where we can accumulate hundreds of items. However, the ability to save is also limited. Sure you have repeatedly tried to install a program or download a file, but you  could not due to lack of memory. Today we will teach you how to make some space on your hard drive by deleting the ” Windows.old ” folder.

In our PC we store many files, photos, videos, documents and a lot of programs. These are usually stored in our hard drive. Most of us are not even aware of the capacity of a hard drive. Generally, we go on saving files and never worry about cleaning the drive occasionally.

Probably there might be a time when we want to install a program or save a file and it has not been possible due to lack of space. Obviously at that time we do not want to start looking what occupies more space on your hard disk. For this, today we are going to show you a way to make some space on your hard drive , which could keep you out of any trouble at any time .

” Windows.old ” is an existing folder in Windows 8 that occupies space unnecessarily. By deleting this folder you can greatly free-up your drive space.

Follow The Steps To Free Up Your Disk Space:

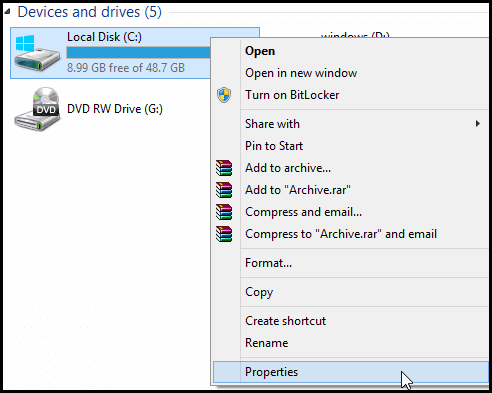
  • Go to my computer .
  • Right click on the drive where you have installed your Windows 8 and select Properties .Free Up Your Disk Space Windows.old folder
  • Now properties window will be displayed , move on to General section and click on the ” Disk Cleanup ” option .Free Up Your Disk Space  Windows.old folder
  • Now your computer will start to search the files that can be deleted. It is a process that will take a while.Free Up Your Disk Space  Windows.old folder
  • After the completion of process , Disk Cleanup Window will be displayed .
  • Now click on the option showing Clean system files . Again It is a process that will take a bit of time.Free Up Your Disk Space Windows.old folder
  • Now look for the ” previous installations of Windows ” in the displayed list. Most of the cases it would be at the end of the list.
  • If you look at the right side of the option you can see the folder size, which is usually high. That is the space which will be free-up when you delete this folder.Free Up Your Disk Space  Windows.old folder
  • Check the box on the left side and press OK .

Once this is done, you will have available space on your hard drive. You can even delete other folders which are displayed in the list like ” Temporary Internet Files “, etc.


Share Your Views In Form Of Comments… 

Categories
System Performance

How To Clean Windows Without Using Any External Application

In OnlineCmag we’ve been teaching over time many tricks to help you optimize the performance of your computer and keep your operating system as clean as possible.

We have already covered tips and tricks like: how to improve the speed of Windows startup , how to locate and delete the duplicate files , how to defragment the hard drive and many more tricks .

This time we gonna teach you the way to perform cleanup and system optimization without using any third-party applications. There are many aspects that are necessary to keep Windows clean, but we will focus on the main factors.

Follow The Below Factors To Clean Windows :

  1. Cleaning temporary system files: All the temporary system files are stored in the path ” C:\Windows\Temp “. By removing these temporary files you will gain in space and performance. All the files that you find on this route refer to temporary files of the operating system itself.
  2. Cleaning temporary User files: All the temporary files are stored in reference to the particular user’s location. These files can be found in ” C:\Users\USER-NAME\AppData\Local\Temp “, replace ” USER-NAME ” with your username. Again, all information housed here can be eliminated.
  3. Using Disk Cleanup in native Windows: When windows is installed, it brings certain default applications or options which will help us to maintain it. ” Disk Cleanup ” is such privilege which will help you to eliminate the storms that have previously been in Recycle Bin, temporary files from Internet Explorer, thumbnails, and so on.How To Clean Windows Without Using Any External Application
  4. Using the native Windows defragmenter: In OnlineCmag we have explained the benefits of defragmenting your hard drive. Windows has a default application for defragmenting your hard drive.This native OS application shows the status of the disks and give us the option to defragment.How To Clean Windows Without Using Any External Application
  5. Using the msconfig tool: Launch the Run command and type ” msconfig ” in it and then press enter. Now the system configuration panel with interesting options will be displayed. Here you can tell Windows that how you want to it start, like what applications to launch at startup or what operating system must be loaded by default among other options. This application is not well known but it is certainly one that offers more help in maintenance.How To Clean Windows Without Using Any External Application
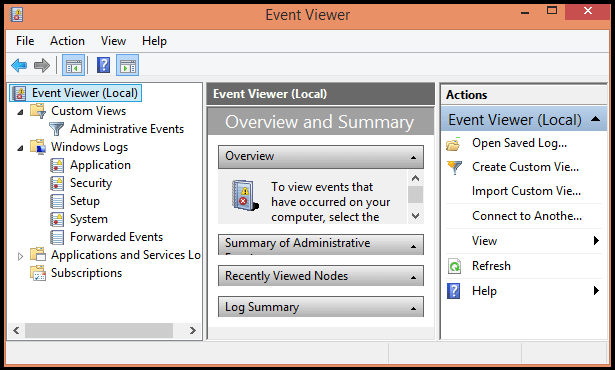
  6. Emptying the Event Viewer: This tool will show all the error messages or problems that have been registered by the operating system. So it should be deeply analyzed. After that delete all records since it will not contribute virtually . To remove just right-click and select the Clear Log option.How To Clean Windows Without Using Any External Application

These steps hardly take any time to complete and helps your operating system be more optimized; which will certainly result in a better user experience.

Categories
PC Hacks System Performance

How To Find And Remove The Duplicate Files In Windows

Over time we tend to store large amounts of documents, images and other general files that often end duplicate or triplicate. Especially in the case of images this problem is high. Mostly it is impossible to know whether this is the same file at first glance , since both the location and the file name may be different. So we are not aware of this duplicity and thereby these files consume space on the hard drive.

Application To Find And Remove The Duplicate Files :

To solve this problem, we have a freely available tool known as ” Anti-Twin ” that promises us to find and remove the duplicate files from the computer easily.

Beyond just searching for the files with same names, this tool also makes comparisons based on the following criteria in particular :

  • Name.
  • Location.
  • Size.
  • Extension.
  • Bytes.
  • Pixels.

How To Find And Remove The Duplicate Files In Windows

Thus, Anti-Twin can compare any parameter that we mark in the path to find the duplicate files and create patterns to show what content is duplicated.

Comparison by pixel is one of the most spectacular options as we may have two similar images with different name, size and extension but not with different pixel ratio, unless you crop them knowingly. Thus, the application will analyze the contents of the image for later comparison with other image content.

How To Find And Remove The Duplicate Files In Windows

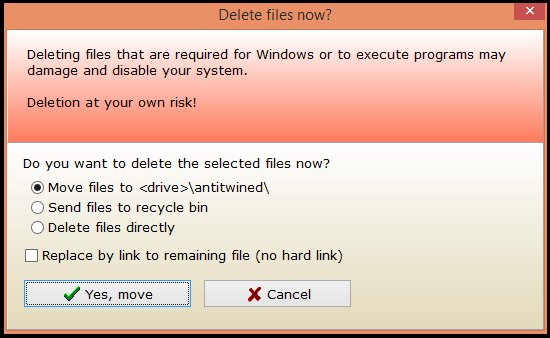
The operation is really simple, we only need to choose the path where you want to look and explain how you want to apply filter . Once the search completes, you will be asked to choose one of the following options to be performed on duplicates:

  • Move them to a particular path.
  • Send them to the recycle bin.
  • Remove them completely.

How To Find And Remove The Duplicate Files In Windows

After the completion of this process , no doubt that you have freed up your drive space and you also have your documents organized without duplication.

You Can Download It From Here

Categories
System Performance

How To Improve The Startup Speed of Windows – Dummies Guide

As time passes, mostly we notice a degradation in the startup time of Windows. The startup time during the first few days of an operating system’s life is only a few seconds but with time it would drastically increase and could even be several minutes.

The explanation for this degradation is not so simple as there are many factors which may affect the startup speed of Windows.

Factors such as hard disk fragmentation and the number of applications that are to be configured to run at startup , are also the additional tasks that a computer must perform.

Sometimes it is not easy to detect what applications or services are being Run with the startup and not necessarily in the foreground. They may even be launched silently without any notice.

Applications Dragging Startup Speed Of Windows

To overcome this situation and identify which applications are causing trouble to the Windows startup , we have a free tool called  Soluto “. It tests your computer and shows you the results visually( In form of graphs ).

After installing the application, you will be prompted to restart your computer. After restarting your computer, you can get all the necessary data and information about the startup. Soluto will divide all detected applications into 3 groups and display them.

3 Different Types Of Applications :

  1. Critical applications : They can not be removed as they are part of Windows itself.
  2. Potentially removable Applications: These applications can be removed from Windows startup provided that the user is aware about the problems which may arise because of this removal.
  3. Removable Applications: In this group all applications that are expendable and recommended to remove are displayed.

Besides showing the grouped applications, Soluto will allow us to make the necessary modifications in them to optimize our system and increase the startup speed.

You Can Download It From Here

Categories
System Performance

How To Optimize And Reduce The Consumption Of RAM In A Click

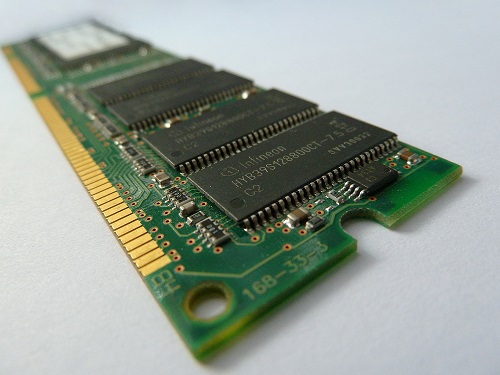
RAM (Random access Memory ) is one of the most important elements in any hardware device , either at the user level like in desktops, laptops, computers or even at professional level like in large processing servers .

The Random Access Memory enables the device to load the instructions that run the processor and other computing elements , called the random fact . It is given the ability to enter information in any memory location without any order, and all memory spaces will have the same read and write speed.

Optimize and Reduce the Consumption of RAM , RAM (Random access Memory ) is one of the most important elements in any hardware device , either... Optimize and Reduce the Consumption of RAM in a click.

This type of memory is so important that the motherboard takes a verification process before starting the memory system . If any problems are detected by the operating system, then board will beep to alert you that it will not start.

Giving the importance to this element, it is vital to make good use of it as well as optimize and reduce consumption as much as possible to avoid slow degradation of your computer.

Application To Optimize And Reduce The Consumption Of RAM :

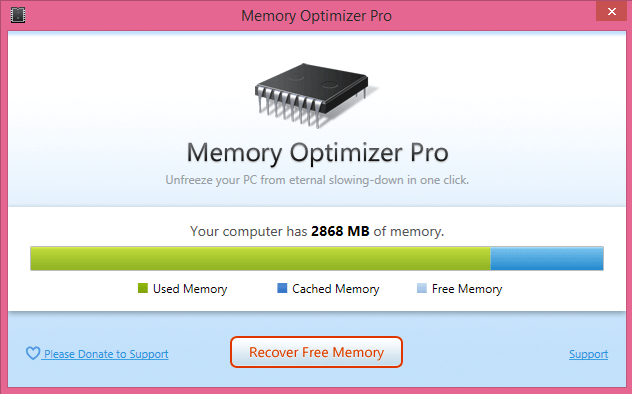
To do this we have a great tool called ” Memory Optimizer “, Which analyze the consumption of RAM and subsequently optimize it to its full potential , all just by pressing a button and its completely free.

Optimize and Reduce the Consumption of RAM , RAM (Random access Memory ) is one of the most important elements in any hardware device , either... Optimize and Reduce the Consumption of RAM in a click.

The application doesn’t have any choice, nor has different parameters and possibilities, its only function is to optimize the memory after pressing the center button.

Optimize and Reduce the Consumption of RAM , RAM (Random access Memory ) is one of the most important elements in any hardware device , either... Optimize and Reduce the Consumption of RAM in a click.

If your computer is running slow because of insufficient RAM, Then we recommend you try this app and comment if you noticed results with it.

You Can Download It From Here.

Categories
Software

3 Applications To Defragment Hard Drive Of Your Windows PC

The hard disk is constituted by a series of blocks and sectors. While entering information on your hard drive the operating system is responsible for placing this information in the sectors and blocks, one after another.

At the moment if we delete any information from the hard disk, either by uninstalling programs or by deleting files, Then these blocks will be disarranged.

To overcome this problem we should Defragment the hard drive. By Defragmentation we can reorder the information on the disk, thus can improve the performance of the system and also extend the life of the hard drive.

The Ultimate Guide To Extend Your Computer Lifespan

Fortunately, there are many ways to enhance your computer lifespan, rather than shelling out your cash to buy a new one. To boost your system’s lifespan

Read More

Applications To Defragment Your Hard Drive

#1 Disk Defragmenter

The first and most popular option is the ” Defragmentation utility ” that is given by Microsoft itself. In general terms, it does the job quite well but does not have many options for implementing the process.

3 Applications To Defragment Your Hard Drive In Windows , Defragment Your Hard Drive In Windows

The usage is quite simple in Windows 7 and the later versions, the utility is summarized with only three options, one of them is to schedule an automatic defragmentation, another to analyze the disk beforehand to see how you will get the disc once defragmented, and last option is the one that performs defragmentation.

Smart Defrag

If we search for a defragmentation application in any search engine, certainly the first choice is Smart Defrag. This is because it is one of the most popular and best rated free alternative available.

3 Applications To Defragment Your Hard Drive In Windows

Image Courtesy By : iobit

This gives us some more advanced and custom settings like you can select the disks that you want to carry out defragmentation to and even gives us the ability to select a specific directory.

Remarkably, the application runs in the background, reducing the consumption of system resources. You can download it from its official website.

Auslogics Disk Defrag

The third tool is another free alternative like the other two. This is also quite similar to the above application The only difference is it provides you more advanced options to optimize your hard disk.

It even features additional tools to optimize the file system and also has fast read & write option. This greatly helps to improve computer performance indeed.

In my opinion, Auslogics Disk Defrag is the best of the three alternatives and you can download it from their official download page.

3 Applications To Defragment Your Hard Drive In Windows

Image Courtesy By : Auslogics

Your Thoughts

Tell us in the comments your experience with these tools, or if you know any better do not hesitate to share them with our readers.