Categories
Tech News

This Is Why The World Moved Onto UEFI From BIOS

Finally after over three decades of supremacy, IBM’s creation i.e. the Basic Input Output System (BIOS) is now at the end of its glory days. Featuring advanced and better resources, the UEFI (Unified Extensible Firmware Interface) is all geared up to cast its shadow over BIOS. It wasn’t that there was no UEFI earlier but the advantages it has over BIOS couldn’t be neglected for long. In this article we take you through the differences between UEFI and BIOS; hence helping you understand what the UEFI is all about.

The Basic Functionality Of BIOS And UEFI:

BIOS and UEFI are both firmware interfaces in computers. Their basic function is same, and involves making your computer hardware and software co-ordinate with each other. They help booting up your computer in almost the same way. But the thing is, how they do what they do differs. Here is a fact-file of all those differences:

The Start-Up:

BIOS (within its ROM) contains that small 16-bit code which has the information of the address of device from when the operating system is to boot-up from. Because of its size (16-bit) the amount of code executed at an instance is much less and is a bottleneck for the current age of computing.

The UEFI on the other hand, stores this system boot-up information in a .efi file. This file is present in the special hard drive partition, ESP (EFI System Partition). Additionally this partition is also includes the operating system’s boot loader programs. So the UEFI itself takes care of the boot loading tasks eliminating the need for an operating system boot loader.

The Size Issues:

BIOS uses the MBR (Master Boot Record) to store information about the logical hard drive partitions. Since BIOS has to load the initial boot program into this 32-bit sized entries table, the maximum storage space that can be addressed is only 2TB. It means that in no sense you can partition a hard drive of size higher than 2TB. Or simply put, the MBR is incapable of handling a partition of size above 2TB.

In UEFI, the hard drive information is stored in the GUID partition table (GPT) instead of the MBR. The main difference is the 64-bit entries size in GPT, which enables the UEFI to hold drives of much larger volumes than the 2TB mark with that too with any number of partitions( for MBR only 4 partitions can be handled).

Speed and Security:

Since UEFI is platform independent, it doesn’t depend on the operating system that’s installed in your computer. So the brighter side is that there is automatically an improvement in performance of your computer. It means that there is significantly an enhancement in the boot time and the overall system speed.

It’s not just a good performer but also the safest it can get. In BIOS there are chances for the malware to reside in the MBR thus being undetected by the operating system and eventually disturbing the structure of the MBR. But UEFI comes with the Secure Boot feature, which loads the boot loaders after they present their digital signature assigned by the kernel. It goes on till the control is completely shifted to the hands of the operating system, thus eliminating any malware intrusions.

These are few areas in which there is a notable difference between the BIOS and UEFI. Also the fact that, it has long been featuring in the Mac computers, make it more reliable. But a downside is that, in a computer running on UEFI the installation of other operating system is really difficult.

Categories
PC Guides

This Is Why You Should Try The Dvorak Keyboard Layout

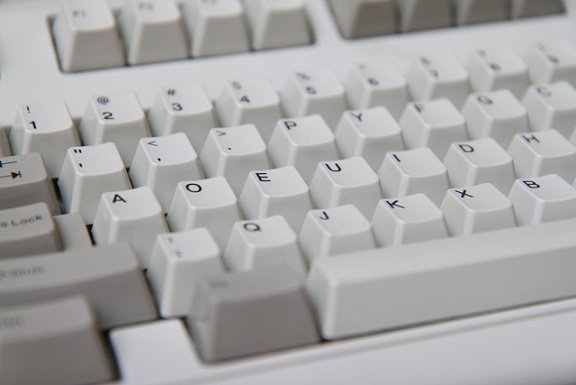
QWERTY for many decades now has been the most used keyboard layout. Most of us are very well accustomed to this layout and don’t even bother trying the other layouts. Well for your information there are also 6 other keyboard layouts which are famous at some parts of the world including: AZERTY, QWERTZ, DVORAK, COLEMAK, MALTRON, JCUKEN. In this article we show you should try the Dvorak keyboard layout.

This Is Why You Should Try The Dvorak Keyboard Layout

All The Various Reasons You Should Try The Dvorak Keyboard Layout:

#1 Dvorak Is Designed For Typists:

The QWERTY keyboard layout is developed as a solution for jamming typewriters. In this keyboard layout, the most struck keys are kept distant from each other. Due to this reason, the typist could type for longer strands without being obstructed because of a jammed typewriter.

But fortunately or unfortunately, this has become the standard typing layout with more and more people getting used to it. But, anyways, Dvorak layout is specially designed keeping in mind various aspects a typist requires.

Hence, the QWERTY is for typewriters and Dvorak is for typists. Now that the typewriters are almost obsolete, it’s time we changed for the better.

#2 QWERTY Is Slower Than Dvorak:

In the Dvorak keyboard layout, the home row is filled with the most used keys. Due to this there is almost a 70% of total strokes on home row in Dvorak keyboard layout when compared to QWERTY keyboards. Anyone who has a little idea about how fast typing works, would know that their first typing lesson is to rest all the fingers on the home row.

Due to closer-by arrangement of most frequently used keys, the distance the hands travel on the keyboard decreases significantly; thereby improving the typing speeds to a farther extent.

#3 The World Of Comfort Dvorak Keyboards Give You:

Now that the frequently used words appear in the home row, the distance your hands travel while typing reduces. This enables you to even type single-handed and thereby reaching out for keys like in QWERTY layout decreases.

This though may not look much significant but remember, it’s enough to keep you away from injuries like the repetitive stress injury. If you already suffer the symptoms of a repetitive stress injury, its high time you tried the Dvorak keyboard layout.

#4 Switching Away From QWERTY Is Easy:

Studies have always shown that typing on QWERTY is a bit tough compared to others. Also if you are exceptionally good with QWERTY keyboards, then the switching would be much easier for you. This is because Dvorak is much easier to learn than QWERTY.

It’s only that you haven’t tried anything new and stuck with the QWERTY layout, once you give a try at some other keyboard layouts like the Dvorak, you’ll surely understand what we are talking about. For this you have tons of online resources and typing tests. Do make sure atleast you give it a try. Who knows maybe you’ll like it, like many others do!

#5 You Make A Lot Lesser Mistakes:

In QWERTY keyboard layout you are sure to create more mistakes. It isn’t a myth but because of the factors like: having to reach out for keys, typing with your left hand, using the same finger to type multiple keys consecutively or so on.

All these go flat with the Dvorak keyboard layout and you’ll surely be more accurate with your typing once you get used to it.

Conclusion:

You would have by now understood what you have been doing wrong all this while and looking to try out the Dvorak keyboard layouts. So, you don’t have to worry, there actually are manufacturers producing these keyboards. There is any possibility where you can change the default keyboard layout in the operating system controls, but it really isn’t much of a solution.

Categories
PC Guides

The 6 Steps Your Computer Has To Go Through For a Boot Up

The world we live in today surely wouldn’t be the way it is had there been no computers. Thanks to those masterminds who have revolutionized the life on earth by introducing these devices. While these devices are making our lives easier and luxurious, studying about various aspects of computers is fun too. So, one such aspect every computer enthusiast would be so interested is about how it boots up (i.e. how it starts).

The 6 Steps Your Computer Has To Go Through For a Boot Up

6 Steps Your Computer Goes Through While Boot Up:

Unlike other electronic devices, a computer follows several steps in order to boot up; in this article each step is explained clearly. Note that the boot up process is completely dependent on the BIOS chip and hence could possibly vary a little between manufacturers.

Hardware Start –Up:

Once you have pressed the power button, the power supply is to be distributed among all the various hardware components present within your computer including the BIOS and processor.

It may happen that the power received by components isn’t at the required level due to which the hardware remains unresponsive. In such cases, a signal which signifies a power failure is sent and the user has to power off and then later begin the startup process. In every other case, the hardware is ready and an LED usually lights up signifying proper hardware startup.

The Processor’s First Process:

Now that reliable power is supplied to all the components including the motherboard’s chipset and processor. The processor is ready to start its first process. But since there is no memory, the processor is caught up not knowing what to execute and from where. So as pre-designed by manufacturers, the control shifts to that little code present in the BIOS chip.

This code is very small and is present in the default memory location from where the processor starts booting up the operating system. In the meanwhile since the BIOS chip is ON, it performs the power on self test.

BIOS: Power-On Self Test

Like already mentioned, BIOS performs the power on self test (POST) at the very early stages of your computer startup. The question here is why? Actually, to put it plainly, it is to let you (the users) know if there are any fatal system errors. It works like a diagnostic tool.

In motherboards featuring built –in speakers, the end or success of the POST is signified by a beep. If your system isn’t beeping at startup then you have the opposite kind where you receive that beep in case of any system error.

By the end of the POST, all the devices and interrupts are checked, identified and properly initiated.

The post-POST part:

By now the BIOS is aware of all the devices attached to the motherboard. Now the code present in the BIOS starts executing; and tries to communicate with the other BIOS chips present in the devices.

First the video card BIOS is communicated with and it then makes the video card display the first screen. (Usually the information of graphic card or motherboard is displayed). Later the other BIOS codes are also executed one after the other.

The Next Phase – Searching…

Now that one half of the entire process is done, the BIOS now searches for a drive to boot the operating system. Usually it looks to boot from a floppy disk and if its not available, it proceeds to the hard drive.

All this searching is defined within the code present in the system BIOS. Once the drive is selected, the BIOS now looks for information required to boot operating system into that drive. For this it goes through the master boot record.

The Final Take-down:

The information present in the master boot record is verified and the booting of operating system begins. In the meanwhile, the boot sector loads this code into memory at the location 0000:7C00. Once this is done, the computer now hands over the control from the BIOS to the operating system.

Once all the files in your operating system are loaded into memory, you are displayed the operating system screen and there you go, everything you need is prepared by the operating system itself.

Categories
Security Web Guides

How to Avoid Malicious Softwares Using Google Chrome

Internet is full of all kinds of software , and also a part of it are the malicious software. These software could be used against us and can help hackers steal our data, monitor our tasks, infect our devices, for the economic benefit of the creator, and many more.

It is impossible to find a method that works 100% to avoid this malware infection, but we always have some kind of protection if we have adequate security. Although as I have always said the best antivirus is common sense. Still, not everyone is ready to surf the Internet without any kind of ” shield ” .

How to Avoid Malicious Softwares Using Google Chrome , Avoid Malicious Softwares , Avoid Malicious Softwares

In recent years, Google has been developing a type of protection system that can notify us when potential threats are detected by the Google Chrome. It is useful for people who don’t use any protection. It is not foolproof, because no antivirus is 100% accurate but can definitely save us from some unexpected frights.

The project takes a long time in development by Google and the system is already well advanced. It warns you when the Google Chrome note that some malware can affect your computer . It is available for Windows, Android, Linux, and Mac OS. Probably we will see this option in the official versions of Google Chrome in 2016.

Steps To Activate The ” Avoid Malicious Software ” option :

To activate this option we should access the hidden browser options of Google Chrome. This page contains information about all the on  going projects which Chrome is undertaking and are not 100% completed. Now, just copy and paste the below Line to the address url bar of your Google Chrome and hit enter .

chrome://flags#malware-interstitial-version

Now the hidden browser feature page of Google chrome will be displayed.

In malware interstitial version select the ” New version ” option from the scroll down menu. After this you need to restart the browser and then it will automatically start its work.

It may not provide complete and highly efficient protection, but fine for people living idly surfing the Internet. In addition, it will help Google Chrome in testing one of their new projects which have good sense, which then lets you go faster.

Note :  1.) Don’t Try to change any other options in the hidden browser feature section as they are not yet tested and the consequences could be severe .

2.) If at all by the time you are trying this, if you can’t find this option on that page, it is to be understood that the feature is already added to your Chrome as an update.

Share Your Views In Form Of Comments…

Categories
PC Guides

Here’s Everything About The Master Boot Record – MBR

MBR, the short for Master Boot Record and commonly known as the sector 0, is the first sector of the computer which holds the key to loading the operating system. It also contains crucial information about the logical partitioning of the hard drive. Understanding the Master Boot Record isn’t all so easy but for all those computer enthusiasts, we have managed to put up what it means; its purpose and functioning alongside some defects it has here in this article.

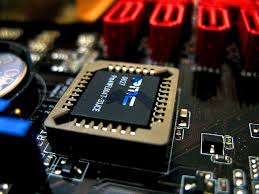
MBR: Master Boot Record - BIOS chip

What is the MBR ( Master Boot Record ) ?

MBR (Master Boot Record) is that place within the hard drive into which the BIOS can load the initial boot program. This program then starts the process for loading the operating system. Also, in every hard drive the MBR is a starting point which contains information about the number of partitions and their types.

Usually we come across this while partitioning a new hard drive so that it gets the ability to store information. Like MBR, GPT (GUID partition table) is another way of storing the partitioning information in the drive.

The master boot record is sometimes called a ‘master partition table’; this is because it contains a table which has in it the details about each and every hard drive partition, the hard drive is formatted into. The next structure is that which contains a small computer code, which when run starts the boot process. This process hands over the control to the operating system as soon as it is loaded into the RAM.

By now you must have understood how crucial role the MBR plays in booting up your computer. Any slight modification of information present in this record could totally disturb the boot up process. Due to this reason, it is very sensitive and a virus attack in this region is really going to hurt!

These viruses can corrupt that little piece of code present in the master boot record and completely destroy the hard drive, not to mention the booting process as well. In such cases you are to repair your MBR.

The little disadvantage the MBR carries with it is that it can handle only up to 2TB. Due to this it supports only a maximum of 4 partitions. But anyways, it isn’t really such a bottleneck.

Categories
Featured

These Are The 6 Steps  Involved in 3D Printing

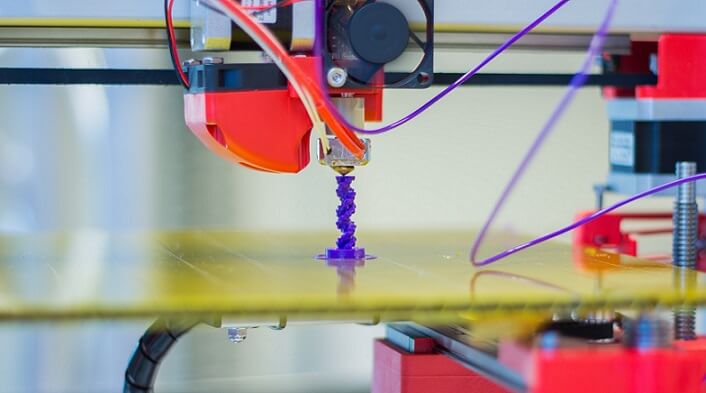
3D printing also known as additive manufacturing, it is that process through which solid objects can be built from digital files. This can be achieved with using various 3D printing techniques. Most of these techniques involve the creation of an object by laying down thin layers successively. Well anyways, the process of 3D printing and the various techniques involved is out of scope of this article. In this article we take you through all the 6 steps that are to be undergone for printing a 3D object.

These Are The 6 Steps  Involved in 3D Printing

Here Are The Steps Involved in 3D Printing:

#1 CAD File Development

In order to produce a 3D object you first have to have its virtual design. This is to be done using the Computer Aided Design (CAD) software. Through this the exact dimensions of the objects considered and simulated to see how the object will behave under various conditions.

#2 CAD File Conversions

Once the CAD file is developed, the next thing one has to consider is converting it into specific file formats. The file formats are specified based on the technology of printing being employed by that particular 3D printer. For instance, the CAD file has to be converted into a STL (standard tessellation language) if the printer is based on the stereolithography technique.

#3 STL File Manipulation

Now that the STL format file is ready with you, all your computer now needs is a 3D printer which can print using the stereolithography technique. But before this, users will have to set the orientation and size of the object to be printed. This is similar to the case of a 2D printer.

#4 Preparing The Printer

Now that everything about the digital file is ready, you need to make sure the 3D printer is ready as well. This means installing properly the polymers, binders and other material which are necessary to perform a print operation. Once all such requirements are met, you are almost ready to print.

#5 The Building Up

Once the process has started, it is now all about patience. These printers aren’t as faster as the 2D printers. Based on the complexity of the object to be printed, the span of printing varies. Simply all that one has to do is wait and perform random checks to make sure everything is being done flawlessly.

Since the entire construction of the object is in form of very thin layers, it definitely is going to take some time.

#6 Post Processing Stuff

Once the entire process is done and the object is ready, make sure you handle it carefully. Any actions in haste could prove to be costly. So right from putting on some gloves to bring the object out of the printer to brushing off any residual powder, everything is to be handled carefully.

And that’s it! If your CAD file is perfect and the post processing part is well executed, then you’ll have it; your first 3D printed object.

[Source: The Book ‘Additive Manufacturing Technologies: Rapid Prototyping to Direct Digital Manufacturing’]
Categories
PC Hacks Web Guides

How To Connect A Hard Drive To Every Computer On The Network

Many times we may have to move files from one computer to another, say, for printing something or just to watch it. If our computers are not having Bluetooth then we need to move the files to a flash drive or hard disk and later copy them to other devices.

To solve this problem, we have come up with a solution by which you can connect a hard drive to all the computers that are connected to the local network , either by Wi-Fi or Ethernet.

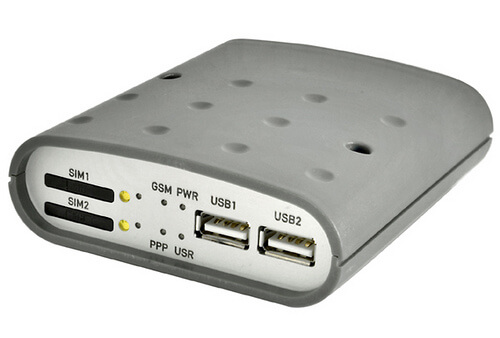
Even If don’t have a hard drive, no need to worry. You can even use a flash drive for this work . What all you need is to have a router compatible with this method.

How To Connect A Hard Drive To Every Computer On The Network

Every Router with a USB input is compatible with this process. Most of the modern Routers have this facility then the old once’s.

Steps To Connect A Hard Drive To Every Computer :

We also need to know the gateway, ie the IP address.

To Check Your IP Address : Follow The Steps Below :

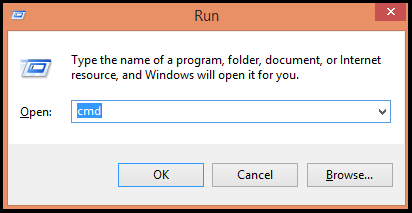
Step 1 : Open Run ( Press ” Windows + R ” to open ) and type cmd in it.

How To Connect A Hard Drive To Every Computer On The Network

Step 2 : Type ” ipconfig ” in the displayed command prompt.

How To Connect A Hard Drive To Every Computer On The Network


Step 3 : Now your Default Gateway will be diplayed which is usually something like ” 192.168.1.1 “.

Follow the given below steps to make your computer to recognize the hard disk or pendrive :

Step 1 : Connect the device to the router.

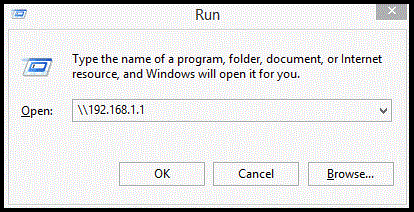
Step 2 : Now open Run and type the default gateway ( i.e the IP address which we got in the first process ).

How To Connect A Hard Drive To Every Computer On The Network

Ex:\\192.168.1.1

Step 3 : Now a dialog box containing folder like usb0_0, usb1_0, and so on will be displayed. Find out the name which is assigned to the flash drive or hard drive to which you want to connect.

Step 4 : Now open ‘My Computer’, you can do it by just pressing ” Windows + E “. Then just right-click on the bottom left and select ” Add a network location ” option.

Step 5 : Now press Next and select the ” choose a custom network location ” Option.

Step 6 : Again press Next and then introduce your gateway i.e type ” \\gateway\usb1_0 “. In this case ” usb1_0 ” is the flash drive folder and gateway is the default IP address.

Ex:\\192.168.1.1\usb1_0

Step 7 : Give a Name to it and press accept.

That’s It. This is something that will save much time if you usually work on multiple computers simultaneously and do not want to use the services like cloud.

Share Your Views In Form Of Comments….

Categories
PC Hacks Web Guides

Easy Way To Create And Extend A WiFi Signal

Recently my colleague asked me  if there is any way he could extend the WiFi signal emitted from a router . To be totally frank , the first idea that got into my brain is to buy another router which would act as repeater if we connect them in form of a bridge . But in absence of budget we should think of more possible and probably better solutions.

After that I questioned myself if there was any possibility of repeating the signal from a computer. After a bit of research, I found two very interesting applications that were intended to solve this problem, so today we’ll take a look at these applications and show you how to create your access point and extend your wifi signal.

Easy Way To Create And Extend A WiFi Signal

Applications To Create And Extend A WiFi Signal :

1. Connectify Hotspot :

The first application that I encountered is ” Connectify Hotspot “. Which is a highly developed and well known application and is on version 7 now. Basically what this application does is, It creates a wireless access point from any type of internet connection that you have connected to your computer . This is very useful if you want to expand your WiFi signal, or to create an access point from a network Ethernet for sharing internet to other devices.

Easy Way To Create And Extend A WiFi Signal

The only requirement we must meet is to have a network card with wireless technology to lift and distribute the WiFi signal. The best thing with ” Connectify Hotspot ” is that it is compatible with all types of connections that exist today , we can share our network from 4G mobile connection to the old dial-up.

The only disadvantage with this Connectify Hotspot is that it allows only 90 minutes of free trial pack , if we want to use the program completely then we must purchase the full version i.e around $ 40 , Which is quiet high .

2. Virtual Router: The free alternative :

Virtual Router is totally free. In my opinion it is the most sensible option, With it we can do almost the same as with Connectify Hotspot . Even the working principle is same , it just repeats our connection through a wireless WiFi card.

Easy Way To Create And Extend A WiFi Signal

Image Courtesy By : Virtual Router

The operation is quite simple, only we need to select our active connection which we want to share. After that you can name the access point and set a password to it , the default security system that is assigned to that WiFi is ” WPA2 ” . So the level of security is pretty good.

The only downside is that we must always be connected to internet equipment if we want repeat the signal in a given area.

Share Your Views In Form Of Comments…