Categories
PC Hacks

How to backup your data using File History in Windows

File History update is a Windows 7 feature , which was not well known and therefore very few people used it. This tool provides a user interface which is easy to access and has more features and was designed to create backup copies of previous versions of your files and important data . So that if something goes wrong, you have multiple versions to restore. Users who are familiar with the application known as ” Time Machine ” developed for Mac, Apple will recognize this concept immediately. However, this program has been introduced in Windows 2003, but then had a more basic form.

Steps To Backup Your Data Using File History :

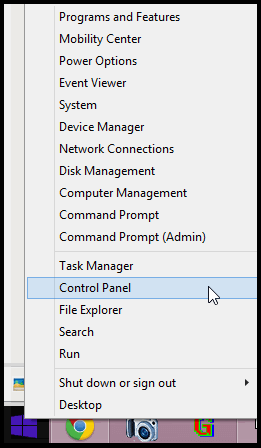
Step 1 : Open Control Panel :

Move your mouse to the top right corner of the screen and click on Search. Now type ” Control Panel ” and hit enter.

How to backup your data using File History in Windows

Step 2 : Save Copy Option :

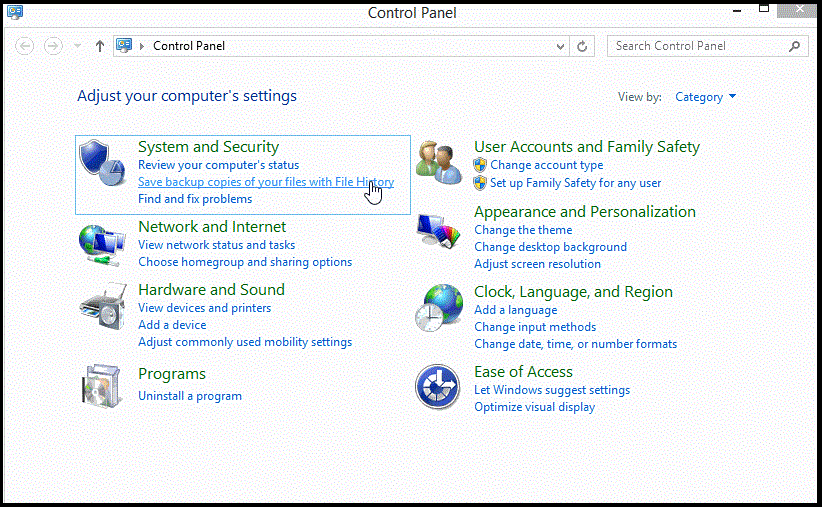
In the Control Panel, Click on the ” Save copies of your files with File History ” option located under the ” System and Security ” section .

How to backup your data using File History in Windows

Step 3 : Enable ” File History ” :

To enable ” File History ” connect an external storage device (such as a USB stick), Windows will automatically detect and configure the location of file history storage; or go to a network folder you want to use for this purpose.

How to backup your data using File History in Windows

Step 4 : Restore :

To restore files, click on the ” Restore personal files ” option located on the left side of the main screen of file history. Then a user friendly interface to navigate recovery files will appear. Simply go to the folder where your file is stored and use the arrow at the bottom of the screen to move forward and backward in time. When you find the file you’re looking for, just right-click on it to view all previous before pressing the big green button that lets you restore the version you want.

How to backup your data using File History in Windows

Step 5 : Set The File Backup Time Interval :

To increase the frequency with which Windows creates backups of your files, just click on the “Advanced Settings” to the right of the Windows File History tab. Now change the setting of “Save copies of files ” as you need .

How to backup your data using File History in Windows

Step 6 : Offline Files :

To access offline files, check the options of history files in the Advanced Setup window. This is ideal for people who travel because when you’re away from the source where you store your backups (eg when you’re traveling with your laptop), you work on the files to be stored on the local formal when you’re back, are synchronized with the location of your backups.

How to backup your data using File History in Windows

Step 7  : Exclude Folders :

If you want exclude a specific folder from automatic creation of backups, click on the ” Exclude Folders ” option on the left of the main window of the file history .

How to backup your data using File History in Windows

Categories
PC Hacks Security

How To Control The User Login Time In Your Computer

Having control over an administrator account allows you to do certain things, and also you will have the administrator privileges on the system, which gives you an extra advantage over all other users on the system. It is very easy to control the user’s log in time in that system by using command prompt . When a deadline for a particular user is established, the user can only access the system in that particular period .

Steps To Control The User Login Time :

Step 1 : Open Command Prompt : 

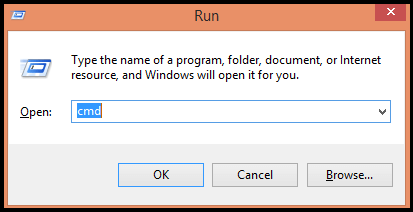
You open it by just simply entering ” cmd ” in your window’s search box Or press ” Windows + R ” ( Run dialog box will be displayed ) and type “  cmd  ” in it .

How To Control The User Login Time In Your Computer

Step 2 : Use Syntax :

” net user ” is the syntax to set the login time.

  • Type in ” net user Username /time:M-F,06:30-21:00 ” .This is the syntax to set the login times for a week .How To Control The User Login Time In Your Computer
  • Replace the word username with any registered username on your computer. This means that the selected user has access to his account ; Monday- Friday from 8:00 a.m. – 9:00 p.m .How To Control The User Login Time In Your Computer
  • Hit enter.

Step 3 : Specifying Different Times Daily :

You can also use the below given form for specifying different times daily.

  • Go to the command prompt as shown above.
  • Enter ” net user Username /time:M,6am-12pm;T,3pm-9pm;W-F,4am-1pm “. This method allows you to set the allocation to the user in different ways for each day. You can do the same by simply entering the day, followed by a comma , and the time range , and a semicolon .How To Control The User Login Time In Your Computer

Tips :

  • You can specify the time in military format as 18:00-24: 00 or you can also use the standard time format as 6:00 am – 9:00 pm .
  • If you want to have a user with complete login time for every day of the week, then simply write the syntax like: ” net user Username /time:all ” .
Categories
PC Hacks System Performance

6 Point Cheat Sheet To Speed Up Your Slow Computer

Is your laptop or desktop slow in processing something? Is it too slow to upload files or applications, and is it taking a long time to start?

It’s a fact you can’t escape from. Even if you are careful and never download questionable content, with time, your system will automatically accumulate more registry entries, errors, and other garbage which automatically slows down your computer.

Steps To Speed Up Your Slow Computer

Step 1: Update your antivirus and run a scan

Antivirus will help protect you from viruses and other suspicious files. Make regular checks and detects extraneous files that try to infiltrate your computer.

How To Speed Up Your Slow Computer Kaspersky and Norton are good reliable antivirus brands, and you can get them at a low cost. Do not use programs like the registry cleaner to improve your registry. They cause you more harm than good.

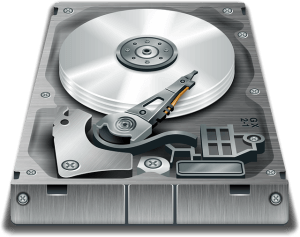
Step 2: Cleanse your hard disk space

Deleting the unnecessary files on your computer is a quick and easy way to free up memory and improve performance.

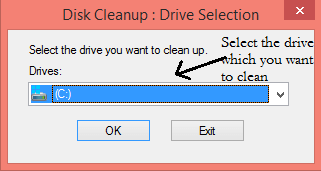
In Windows XP , 7 and Vista : Go to ” Start> All Programs> Accessories> System Tools> Disk Cleaner “. If multiple drives are present then it will ask you to specify the drive you want to clean.

How To Speed Up Your Slow Computer

In Mac: Go to “Applications> Utilities> Terminal”. In Terminal, type ” sudo rm -fr / tmp / * ” and press Enter. Then all the temporary files in your computer will be removed.

Step 3: Uninstall The Unnecessary Programs

These may include games or files that you do not use.

In Windows: Go to ” Start> Settings> Control Panel ” . In control panel, click on the ” Uninstall A Program” option under the programs section.

List of all the programs in your computer will be displayed, Remove or Uninstall all the unwanted applications.

How To Speed Up Your Slow Computer , How To Speed Up Your Slow Computer

In Mac: Directly delete all programs that you do not want to use.

Don’t forget to empty the recycle bin ( Trash bin )after deleting them, As they still occupy space in your hard disk. Just right click the recycle bin and select ” empty recycle bin “.

Step 4: Download and install a spyware remover software

Spyware is a program that monitors information without your notice. For privacy and health of your computer, it is always recommended to remove the malware and spyware.

You should be able to download an anti-spyware software for free. Once you download it, install and run it; if you can’t use it, follow the instructions.

Step 5: Defragment your hard drive

Fragmentation is basically when your computer files are disarranged and affecting the ability of your computer to place the information in sequence. Defragmentation fixes this problem.

How To Speed Up Your Slow Computer In Windows: Click on ” My Computer> Properties> Tools “. Now click on “Defragment” and run the program. You can make your computer to start defragmentation periodically ( after certain intervals ).

In Mac: The OS will not really need to do this, thanks to the optimization standards of Apple devices.

Step 6: Check your RAM

These are memory chips that store information on your computer while it works. If it is not enough for your computer, it will start using up your hard drive, but This is a slower process. If this happens, the computer will start to be slowing down. you can hear it and also watch the LED to glow automatically.

  1. Right-click on ” My Computer> Properties> General “. For Windows XP, it should be more than 256 MB. If it is less than 1024 MB, then its a problem.
  2. If the RAM is the problem, your computer will be slower to open a new application. If your computer is slow
    when you turn it, then it’s another problem.
  3. Before buying more RAM, make sure that you know exactly which type is compatible with your computer and check if you still have empty slots where you can insert your RAM.
  4. For most people, it is better to take your computer to a Repair shop.
Categories
PC Hacks Security Web Guides

Easy Way To Change Your Proxy settings

Want to hide your web activity from the prying eyes ? Are You blocked from accessing some websites that you need , By the government or office, or the school ? Don’t worry Proxies allow you to bypass the locks placed on your connection and hide your IP, Which makes your actions more difficult to follow. Once you find a proxy server you want to connect, you simply need to enter that information in your web browser.

Steps To Change Your Proxy Settings :

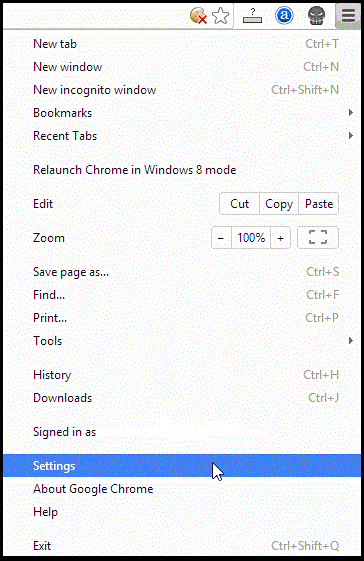
Step 1 : Click on the Menu button:

This is in the top right corner of the Chrome window, and it looks like three horizontal bars.

Change Your Proxy settings

Step 2 : Select Settings :

This will open a new tab in your browser. Click on the link ” Show advanced settings ” which is at the bottom of the page.

Change Your Proxy settings

Step 3 : Click on the ” Change proxy settings ” :

This is located in the Network section of the advanced settings. When you click this button, the Internet Properties dialog box will be displayed.

Change Your Proxy settings

Note: Changing proxy settings in Chrome is linked to your operating system, and as such will affect all applications or programs that are connected to the Internet. If you do not want to change this setting, you need to download a Chrome extension like Proxy Helper or ProxySwitchSharp .

Step 4 : Click the “LAN Settings” button :

Change Your Proxy settings

Now a ” Local Area Network Settings ” dialog box will be displayed . Uncheck the ” Automatically detect settings ” check-box and Check the box in the ” Proxy Server ” section.

Change Your Proxy settings


Step 5 : Enter the proxy information :

Enter the IP address or domain, and also the port to which you want to connect. Click OK when finished.

  • When you have finished using your proxy and wish to return to your direct connection, open the LAN settings again and check the ” Automatically detect settings ” and uncheck the box that is in the ” Proxy server ” section.

Change Your Proxy settings


Share Your Views In Form Of Comments…

Categories
PC Hacks Web Guides

How to Find the Public IP Address of Your Computer

When you connect your computer to a network, it is assigned with an address i.e called as IP address. If your computer is connected to a network and the Internet, then you will have an internal IP address to determine your location on the local network and a Public IP address, which is the IP address of your Internet connection.

How To Find Your Public IP Address Using A Search Engine :

Step 1 : Open Google Or Bing : 

These two search engines allow you to quickly find your external or public IP address. This is the address of your modem or router which is seen by the rest of the internet.

Step 2 : Type IP address :

Write ” IP address ” in the search bar and Press ” Enter ” .This search command displays your public IP address. It runs on Google, Bing, Ask, DuckDuckGo and several top search engines other than Yahoo.

How To Find Your Public IP Address Using A Search Engine :

Step 3 : Find your IP address :

You can see your public or external IP address at the top of search results . If you are using Ask, Then you’ll find it at the top of ” More Answers ” Section.

How To Find Your Public IP Address Using A Search Engine :

  • Your public IP address will consist of four groups of three numbers, separated by periods. For example, you could have the following form : 156.34.25.258.
  • The internet service provider is in charge to assign this IP address. Most external IP addresses are dynamic, meaning these addresses change from time to time . This address can be masked using proxies .

How To Find Your Public IP address In The Router Settings :

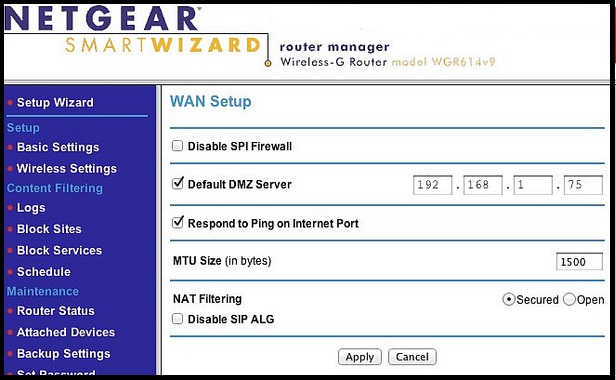
Step 1 : Open the configuration page of your router :

Most of the routers can be accessed through a web interface , that lets you to view and adjust settings. Open the web interface by placing the IP address of the router in a web browser. Check your router’s manual for the specific address . The most common addresses for routers are:

  • 192.168.0.1
  • 192.168.2.1
  • 192.168.1.1

Step 2 : Open the ” Internet ” , ” Router Status ” or ” WAN ” page :

The location of the external IP address is different for each router.

How To Find Your IP address In The Router Settings :

  • If you are using a Netgear router which includes the ” Netgear Genie configuration ” tool , Then click on the ” Advanced ” tab (advanced options) so that you can go to the advanced options section.

Step 3 : Find the IP address :

You can find your IP address under the ” Internet Port ” or ” Internet IP Address ” which is in ” WAN “, ” Internet ” or ” Router Status” section. The IP address contains 4 groups of digits, each group contains up to three digits.

Example : 189.77.99.295.

  • This is the IP address of your router. Any connection that are made out of your router will address.
  • This address is assigned by your Internet service provider. Most of these external IP addresses are dynamic, meaning these addresses will change from time to time. This address can be masked using proxies .
Categories
PC Hacks

How To Format A Hard Drive Without Windows Installation CD

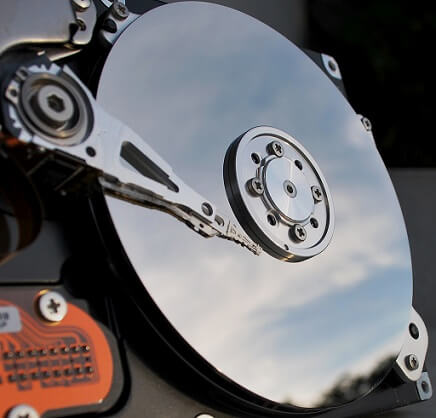
If you have a new hard drive or any used one that you want to clear, Then you need to format your drive. Usually, the easiest way to format a hard drive is to use a Windows installation CD. In-case if you don’t have one, Then don’t feel bad there is nothing to worry you just have to do a little more work that’s it . Formatting a drive is still a simple process, just you have to find the appropriate utilities.

Format A Hard Drive , without windows installation disk .

Things Required :

  •  Startup Disk

Steps to Format A Hard Drive :

Step 1 : Configuring the BIOS :

There is really only one way to format a hard drive i.e through some kind of boot device. If not the Windows CD may be a floppy drive or another CD. When the computer starts, it will ask you to press a key to enter the BIOS; must quickly press the indicated key. Once you’re in the BIOS, look through the menus until you get to an option that says something like ” Device Boot Order “. Select ” CD ” or ” CD-ROM “, ” Removable Device ” or something similar, depending on what type of boot device you will be using. Saves the changes and Exit .

Step 2 : Make a boot disk :

You need to download the files from somewhere to make your device Bootable . There are many websites available that has a good selection of files , some are free and some are not.

For a diskette ( floppy ) : Just insert a floppy disk into the drive and run the utility that you have downloaded. This will make your floppy Bootable .

For a CD : You must have a CD burning software. You will have to run the software to copy the files you downloaded and select ” Do this CD bootable ” .

Upon boot device, ensure that one of the utilities you downloaded has a format tool ( you’ll have to read the documentation well ).

Step 3 : Restart the computer :

Start the computer with the BIOS configured correctly and the boot disk instead. The computer will boot from the boot disk or bootable CD. If you’re using the standard DOS boot disk, you can type ” format c: ” (” C ” refers to the hard disk ). If you are using another program, you must use its commands.

Categories
PC Hacks

How To Change The Graphics Card Of A Laptop

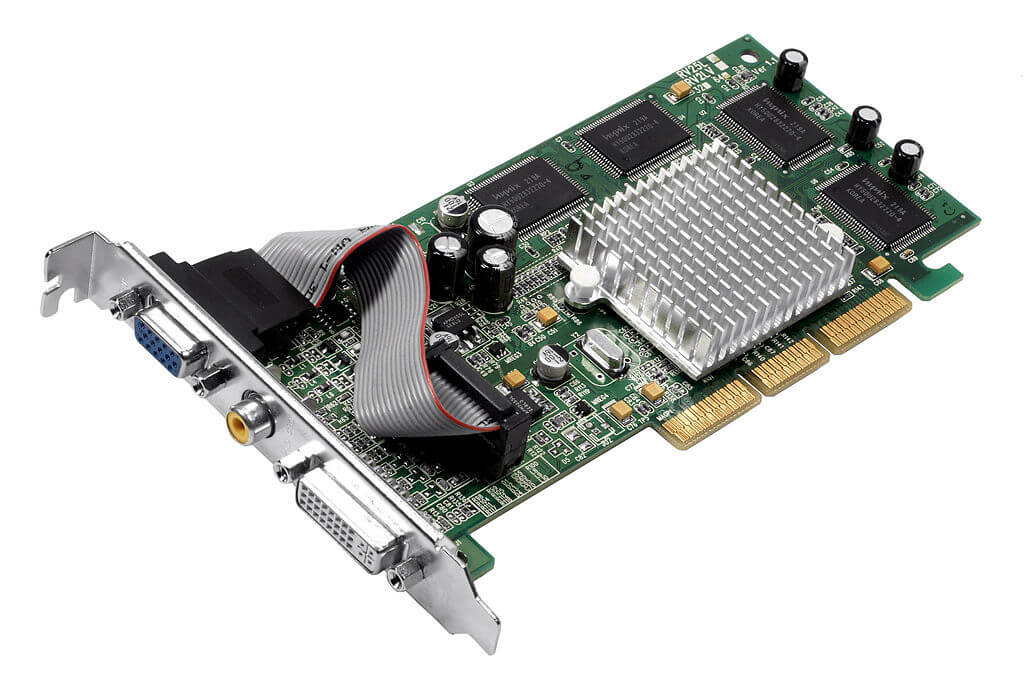
A graphics card is simply a piece of hardware which connects and sends data to the display screen of your laptop. The quality of the videos displayed on your laptop’s screen is largely depend on this graphic card. You can checkout our article on how the graphics processing unit of a graphic card works here. In general, most of the computers use PCI or PCI Express graphics cards. Installing a graphics card is one of the easiest process in the hardware installations that you can perform on a laptop .

Also See: Common FAQs on Graphic Cards

Things You Need :

  • A Phillips screwdriver 
  • A flat screwdriver
  • A wrist strap

How to change the graphics card in a laptop

Steps You Need To Follow To Change The Graphics Card of a laptop:

Step 1 : Turn off your laptop, unplug the power cord, remove the battery and disconnect all cables and any external device .

Step 2 : Wear an anti-static wrist strap on your wrist, and then place the cable clip on the outer casing of the laptop. This will help you to avoid static electricity discharge.

Step 3 : Open the laptop up to the stop. Use the small flat-head screwdriver to lift the keyboard cover . This cover is basically a small plastic strip located between the keyboard and LCD screen.Remove the cover from the keyboard and keep it aside.

Step 4 : Remove the Phillips head screws securing the keyboard to the portable structure. Pick it up and place it face down on the rest of the notebook. Disconnect the keyboard ribbon connector from the motherboard and then remove the keyboard of the computer and put it aside.

Step 5 : Disconnect the LCD ribbon connector from the video card .

Step 6 :  Remove the screw that secures the heat sink to the motherboard. Lift the heat sink base carefully out of your laptop and then keep it aside .

Step 7 : Remove the four screws holding the video card to the motherboard. Lift the old card out of the the base of the laptop and keep it aside. Now install the new video card by placing it in the compartment of the video card and replace the four screws.

Step 8 : Rearrange the laptop by following the steps from 1 to 6 in reverse order.

Step 9 : Insert the disk that came with the new video card into your CD-ROM. Follow the instructions on the screen to install the driver for the new graphics card in your laptop.

Also See: Best Graphic Cards in the Market

Follow all these steps very carefully and simply that’s it! But be sure you handle everything perfectly.

Categories
PC Guides System Performance

Easy Way To Measure Your CPU Temperature

There are many methods to measure your CPU temperature . Generally the CPU temperature is measured through a ” Temperature sensor ” that is located on the motherboard . Almost ever motherboard comes in with a program which lets you to read this sensor. You can use the applications like ” Hardware Sensors Monitor ” Or ” Motherboard Monitor ” for this task that are available freely .

Motherboard Monitor For Measuring CPU Temperature :

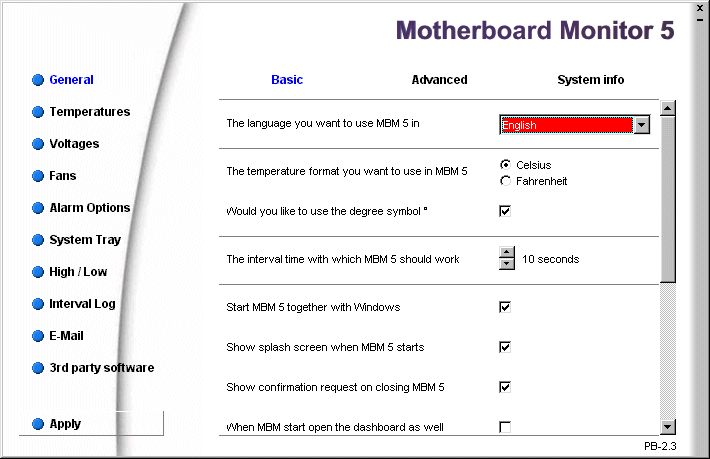
We personally recommend ” Motherboard Monitor ” for measuring your CPU temperature . This program can be directly accessed from the task-bar And it also allows you to set an alarm which will let you know when the CPU reaches its critical temperature level.This application will also monitors the power supply voltages and system fans . This application is highly recommended for the people who overclock their system, As the CPU temperature drastically increases when it is overclocked.
Easy Way To Measure Your CPU Temperature  , There are many methods to measure your CPU temperature . Generally the CPU temperature is measured through a " Temperature sensor " that is located on the motherboard . Almost ever motherboard comes in with a program which lets you to read this sensor.


Measuring CPU Temperature By CMOS Setup :

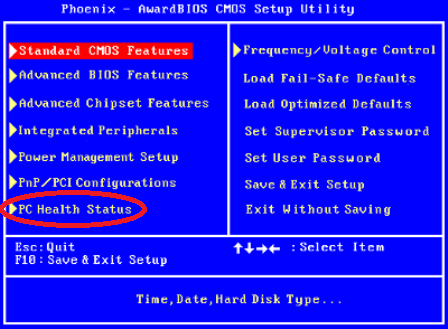
There is also another method to check your CPU temperature i.e though the ” motherboard setup ” . In motherboard setup you will have an option like ” System Health ” Or ” PC Health Status ” Or ” Sensors ” Or something similar based on the manufacturer . The CPU temperature can be easily checked as shown below .

Easy Way To Measure Your CPU Temperature , There are many methods to measure your CPU temperature . Generally the CPU temperature is measured through a " Temperature sensor " that is located on the motherboard . Almost ever motherboard comes in with a program which lets you to read this sensor.

The motherboard setup method is not the right way to check your CPU temperature because it only shows you the temperature at minimum processing power as the system is just started . Thus it won’t reach its maximum temperature. Because of this reason we recommend you a software-based solution like method one .