Latest Trends


Gadgets / Virtual Reality
Get the latest in Tech,
once a week. Free.

VR/AR
Gadgets / Virtual Reality

Gadgets / Products / Tech News / Virtual Reality
Security

How Can You Protect Your Business Against Social Engineering Hacks?May 4, 2025SecurityHave you heard of social engineering hacks? Do you know what consequences these can have for your business? Do you know how to prevent it?
When we talk about social engineering, really we talk about persuasion, the ability to rely on the goodwill and the carelessness of the victim.
What’s your objective?
Information: passwords, bank accounts, or any private information that might be of interest. Sometimes this information is used to perform other more sophisticated attacks and on other occasions sold to the highest bidder.
How do they do Social Engineering Hacks?
Usually impersonating a responsible person or known company, to gain the trust of victims. The media that is used to persuade often vary. It can be a site visit or a phone call, here’s one of the case:
But also they use email, social networks or even SMS. Usually quite common when we surf the web pages and some sort of pop-up as alleged legitimate requests start of the session or even alert us to do something to click on a link.
How to protect my business against these Social Engineering Hacks?
To protect yourself from these; techniques, training, and awareness is a key to distinguish these types of messages piece.
The example of a marketing and design of posters, which undergoes a social engineering attack shown in the following video.
This SME entrepreneur explains how cyber criminals, email impersonating the identity of its external maintenance, manage to gain the credentials of your accounting program. This had serious economic consequences for small business.
What do you think? Have you taken note of the measures taken to tackle the problem? And the most important thing is to make sure it does not happen again?
His vision has been strategic, with the adoption of a Security Master Plan, which goes far beyond a mere internal plan of awareness and training, but will undoubtedly be much more effective in protecting their main asset: the information.
Some good practices to raise awareness and train personnel safety, some specific measures for this type of social engineering attacks:
Do not open emails from unknown users or you have not requested: delete them directly.
Don’t answer in the case of any suspicious messages.
Be cautious when following links in emails, SMS, Whatsapp messaging or social networks, whether known or unknown contacts.
Be cautious when downloading attachments from emails, SMS, Whatsapp messaging or social networks.
Always have updated operating system and antivirus. In the case of antivirus keep it active.
Security Check the Web page where you enter personal data. They must use safety certificate and use the HTTPS protocol.
Check the security of public wireless networks that you connect. If in doubt, do not share confidential information or enter user credentials or passwords that can be stolen.
Type the URL manually, rather than using the links of suspicious messages.
But let us insist you if you have not heard: The main way to protect yourself from social engineering hacks is awareness and training! Protect your company!
Your Thoughts
Was this information useful? Please express your views on this subject in the comments section below. We love feedback! [...]
Why is it not good to use two antivirus at the same time ?April 23, 2025SecurityCan I have two antiviruses at once? This is one of many recurring questions that come to us. One of the most important thing that a computer user should know is having two active antiviruses at the same time is not suggestable.
In fact, it is a bad idea. Apart from causing a false sense of security, it can cause us different problems in the system.
Some of our friends of Kaspersky Lab gave a clear explanation about, why is it not a good idea to have two antivirus solutions simultaneously active. Here’s all about it.
Consequences Of Using Two Antivirus Software Simultaneously
#1 Deadlocked: The antivirus tracks all the applications in the system that are monitored or sending information.
For this reason, an antivirus program that is working (sending and monitoring) will become a malicious software in the eyes of another antivirus program installed on your computer. which will try to block it and remove it.
#2 Fight the virus: When a virus or malware is found, antivirus removes it and leave it in quarantine.If another antivirus program finds the file, even it wants to do the same with him (at the end of the day that’s their job).
Repeatedly sending reports and notifications about a virus that has already been removed. If you do not like to receive, constantly, such messages; then you have a problem.
#3 Resource consumption: An antivirus program needs a lot of memory to analyze the system and perform other operations. If we have two AV programs running at the same time, then the effectiveness of the system will be affected and impaired.
If we have two AV programs running at the same time, then the effectiveness of the system will be affected and impaired.
We recommend you to choose an antivirus that independently tests and have the ability to fight against the latest malicious programs thereby protecting you from any kind of threat.
And in case you want to have a second opinion about the status of your computer, you can use both Antivirus Online or other AntiVirus products specifically designed for this task as being itself ” Kaspersky Security Scan ” with whom you can scan your system without conflicts such as those discussed above. [...]
Tech Trendz: 5 Technologies Fast Replacing PasswordsApril 22, 2025SecurityWe all know how important passwords are to protect our digital identity. There are a lot of suggestions all around to set strong passwords which are a combination of letters, numbers and special characters. And that too a unique strong password to each of the sites you log into.
This means you either have to memorize them all (and that’s effortless assuming we are all genius, which we are not) or use a standard password manager which costs you money.
Create Secure Passwords That Can Be Easily Remembered
Today we all use many passwords without realizing, sometimes we use it for everything, although not highly recommended. It is also a burden for many who miss logic in creating secure passwords
Read More
But there is a fundamental flaw in all these and that is the use of passwords at the first place and then doing everything else to make them overly complicated.
Anyways all is not bad, this video below shows you five upcoming technologies which could completely solve this dilemma by replacing passwords and make our world a digitally secure passwordless world.
The best part is that these technologies are concentrating on replacing passwords with what we can consider truly unique, i.e our biometrics. [...]
Web Guides


Join Our Tech Community For Free
How To
How To Create A Simple Animation Using NotepadJune 5, 2025Notepad TricksHello Viewers, Today we are going to show you a very interesting notepad trick to make your own animations.
Have you ever tried to design your own animation files? If not then start it know. Follow the steps below to create a simple animation.
Steps For Designing A Simple Animation Using Notepad:
Step 1: Open A New Text Document
Right-click on the desktop and select ” create a new text document ” option or just simply Open a New Text Document.
Step 2: Copy-Paste
Copy the code given below on to your notepad carefully.
Click Here To Download The Codes. Note: This download contains 3 Animations: Bouncing Ball Animation Included.
Step 3: Save The Text File
Now Save the file with a ” .bat ” extension i.e something like ” OnlineCmag.bat ”. Select the file type as ” All Files ” and encoding To ” ANSI ”.
Step 4: Run The File
Execute the file by just double clicking on it. If everything goes well you may see the following out puts.
You May Also Like
Notepad Trick To Annoy people by Constantly Repeating Messages
Ghost keyboard Typing | Make Your Notepad type Automatically
Easy Way To Create A Harmless Funny Virus with Notepad
How to Change Admin Password by Batch Programming [...]
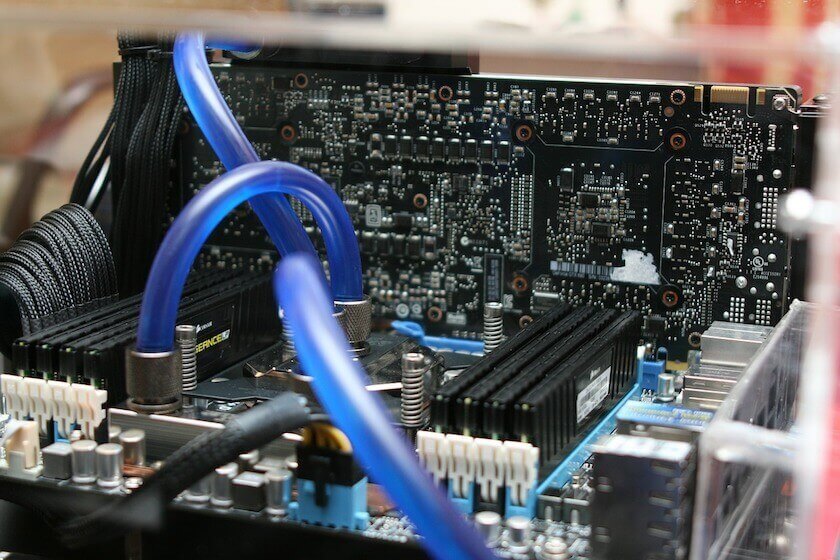
All The Various Factors That Affect Your Computer SpeedMay 16, 2025System PerformanceIt’s not just about how fast your processor is or the gigs of RAM; the computer speed depends on the entire hardware with which your computer is built.
And it all comes down to how fast all the hardware exchange information amongst them and perform their tasks. So, in this article, we discuss the 8 essential factors that most likely affect your computer speed.
Also, note that your computer speed doesn’t depend solely on any one of them but on all of them collectively.
These Factors Affect Computer Speed:
#1 Processor Speed and Instruction Set
The central processing unit (CPU) is the brain of your computer and of course, the processor speed definitely matters. The speed of your CPU or processor determines how fast computers process instructions.
It is generally measured in MHz or GHz (megahertz or gigahertz). This rating actually represents the number of process cycles your CPU runs every second. A 2.6 GHz processor represents a 2.6 billion cycles per second.
But it doesn’t mean a 2.6 GHz processor is twice as fast as a 1.3 GHz processor, it boils down to the instruction set (architecture) of the processor.
Where in which the 2.6 GHz processor may require more process cycles to execute its instructions than a 1.3 GHz processor. Generally, since the information of architecture isn’t revealed it is better to go for a processor with higher clock speeds.
Examples of processor speeds and instruction sets:
Processor Speeds: 133MHz,233MHz, 350MHz, 900 MHz, 1.8 GHz, 2.6 GHz, 3.2 GHz.
Instruction Sets: 8088, 286, 386SX, 386DX,486SX, 486DX, Pentium I, Pentium MMX, Pentium II, Pentium III, Pentium 4 and so on.
#2 Bus Width and Speeds
The bus system is the communication system (a data path) that helps data transfer between the processor and the other components.
Motherboard Chipset Guide: What Is and How Chipset Works
This article will help you understand what a chipset actually means, How a chipset works and what role it plays in being a part of the motherboard
Read More
There are two such buses: The Internal Bus and The External Bus. The internal bus most commonly known as the Front Side Bus forms the network of connection between the CPU and internal components.
And the external data bus connects the peripherals (external devices like printer, scanner) to the CPU.
Examples of bus width and bus speeds:
Bus Width: 8 bit, 16 bit, 32 bit, and 64 bit.
Bus Speed: 50 MHz, 66 MHz, 75 MHz, 100 MHz, 400 MHz and 800 MHz
Bus widths may differ between the processor, memory, external slots and definitely brings in that difference to your computer speed.
#3 The Cache Memory
Cache memory is the extremely fast memory usually built into the CPU. It is similar to RAM but is more easily accessible than the normal RAM. It stores copies of frequently accessed memory locations thus reducing the time CPU takes in accessing the normal RAM.
Does Deleting the Cache Really Speed Up Your PC? – Explained
Often we worry about the speed of our computer and even try to take some serious measures to maintain and improve PC speed But can clearing Cache Actually Speed Up Your PC?
Read More
There may not be any cache memory in some processors and in some, it may range up to 2 MB. But the higher the cache memory the closer to the RAM it is.
The Level 1(L1) is extremely fast and is very low in size, L2 is fast and bigger than L1; the L3 is a little slower and the biggest among the other levels.
#4 Installing a new Operating System
Moving onto the less technical and the software corner of stuff now; a new operating system in an old computer can slow it down.
This is because the operating system takes times to adapt as it has got a huge list of files to load and make use of.
Best Lightweight Linux Distributions For Old PCs And Processors
These best lightweight Linux distributions offer countless advantages over other operating systems. Puppy Linux, Damn Small Linux, Lubuntu and the other
Read More
#5 Is your Hard Drive full?
It is commonly observed that as the hard drive is filled with data the slower it gets. It is because now the operating system has to look for the required files amongst more number of files. Also, the effect of aging on the hard drive becomes apparent.
The other way to look into this issue it the concept of fragmentation, due to which the workload of the operating system is immensely increased. However, the fact is the hard drive and hence your computer gets slower with age and usage.
#6 The Start-Up Applications:
Well, this last factor has got nothing to do with the manufacturers. Not even the best computers can perform up to the mark if there are a flood of start-up applications loading alongside the operating system.
Though you set such applications to run at startup on purpose or unknowingly, they eat up your computer’s resources and make life difficult for the operating system (particularly while loading).
6 Point Cheat Sheet To Speed Up Your Slow Computer
Is your laptop or desktop slow in processing something? Is it too slow to upload files or applications, then it’s time to speed up your slow computer follow
Read More [...]
Tools To Remove Password From PDF File In Under 2 MinutesMay 15, 2025PC Hacks / SoftwareHave you downloaded a PDF file with password? Do not worry, in this article we are going to show you how to easily remove password from PDF file with these simple tools.
The PDF documents are one of the best ways that exist for the exchange of information, as it is one of the most widely used worldwide formats.
However, this file sharing carries some problems associated with protecting them. One of the most common is to remove password from PDF .
How to Change Admin Password by Batch Programming
There are many amazing and simple tricks that help you to change admin password of any computer . We are going to show a simple trick by which you
Read More
But fortunately, there are a number of applications that allow us to solve the problem in less than a minute.
These tools are known as “password removers”, that provides users a simple way to solve this inconvenience. These platforms allow us to skip the key protecting PDF files and then edit or print them.
Here Are The Best Software To Remove Password From A PDF File :
1. Smallpdf :
This Tool is very intuitive and allows you to unlock a PDF without a key in seconds.
You only have to upload the document to the web and check the box for editing the file permissions. You can then download the file to your desktop, upload to Drive or DropBox.
2. Online2pdf :
Online2pdf not only allows you to remove password of a PDF but you can also edit, merge or export the contents.
Of course, each individual file can not be larger than 50 MB and all documents should not weigh more than 100 MB. At most, you can select 20 PDFs.
With these previous data, all that remains is to upload the file where it says “Select Files”, set the options you want and click on “Convert”.
How To Password Protect A Folder Simply Using Notepad
Does your Computer has multiple users? Are you Worried concerning about the files or folder access?This is a very useful trick to Password protect a folder
Read More
3. PDFUnlock
As we indicated on the cover of PDF Unlock , this tool allows you to remove all restrictions from a protected PDF file .
Just select your file from your computer, Drive or DropBox and click “Unlock”.
Easy, right? [...]